Seedlings Archives - Hedge and Stone

Summer garden pests and diseases

Posted by | Garden Design, Garden Maintenance, Landscape Advice, Pests and diseases, Seedlings, Snails, summer gardening, Summer gardens, Uncategorized, Vegetable gardens | No Comments

Snail

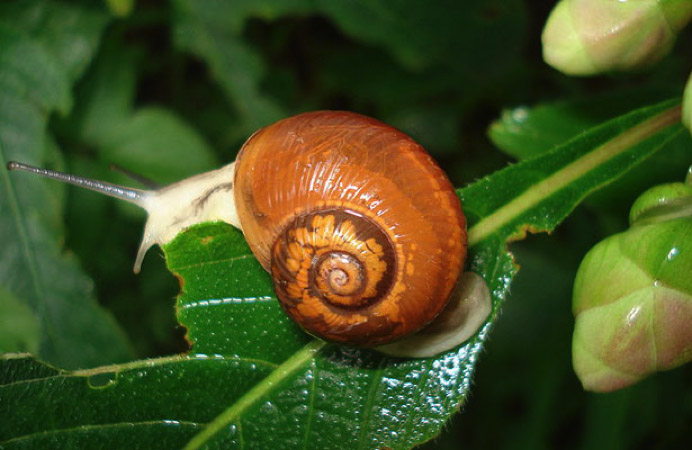
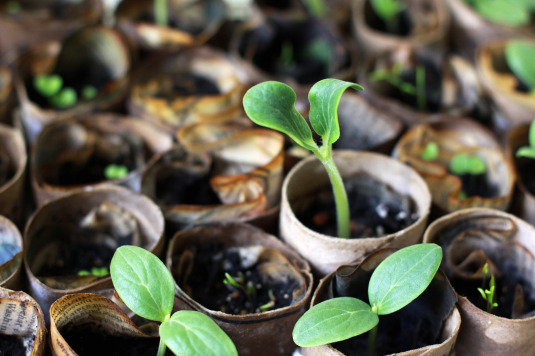
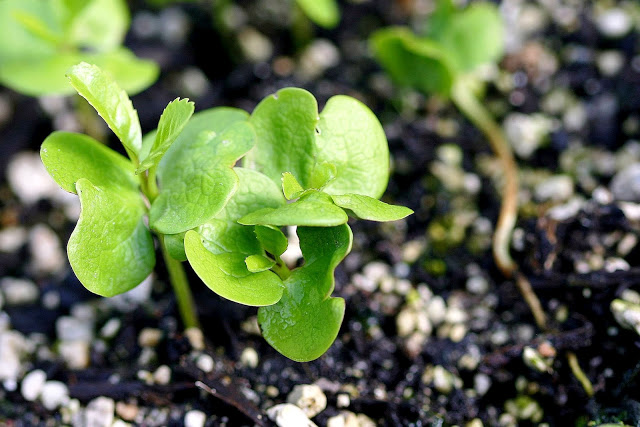
Many common garden pests emerge as the warmer months ensue. By mid to late summer, if allowed to proliferate unchecked, these pests can cause serious damage to plants. Healthy plants will always have a better chance at resisting the scourge of pest infestations; working on the overall health of your garden will minimize the impact of common pests and diseases.

Common pests and diseases include…

Snails and slugs – familiar to us all, there are many home remedies for controlling snails and slugs. Labour intensive but effective, is manually removing them by torchlight, on moist nights, when they appear on paths and lawns to feed. You can set out beer traps, saucers of beer, which the snail are attracted to then remove the snails by hand – two hours after sunset is the best time. Many chemical controls are dangerous to other children, pets and animals – snail pellets with an active ingredient of iron sulphate are a safer solution however still dangerous to dogs if consumed in quantity. Far and away the most important step you can take is eliminating habitat; snail and slugs hide away during the day in leaf mold, under pot rims, in rock borders etc. – if you keep these areas clean, you can limit the number of snail and slugs in your garden.
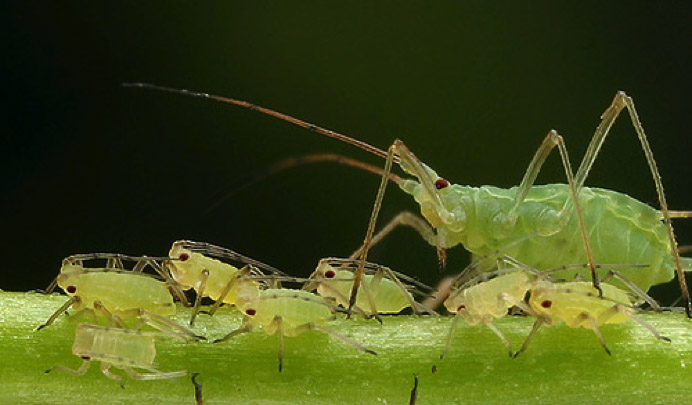
Aphid

Aphids

Aphids are tiny, prolific sucking insects, commonly green however can also be black, brown and pink. They attack new growth on ornamental flowering plants like roses as well as many vegetables. They weaken the plant by sapping nutrients and damaging the plant stems and buds and making the plant vulnerable to diseases.

Aphids can be removed manually by squishing the aphids, wiping and spraying them off with water. Alternatively, they can be controlled with soap sprays and white oil.

Scale

Scale are similar to aphids, scale are sucking insects however are immobile and appear as small, dry, white bumps on the surface of leaves and stems. They weaken the plant similarly to aphids.

Scale can be removed by manually brushing from the leaves and stems with soap spray. There are chemical products available to help control serious infestations.

Thrip and mites

Difficult to see because of their size, the effects of thrip and mites are obvious on your plants when you have an infestation on your hands. Spider mites affect azaleas in particular, causing the leaves to appear stunted and bronze in colour.

Control mites by installing aerial spray irrigation systems as the mites cluster on the underside of leaves and can be inhibited by regular spraying with water. Chemical miticides are available but not always effective. Biological controls such as encouraging lady beetles and other ‘good’ garden insects as well as under-watering from spring through summer will help minimize the impact of thrip and mites.
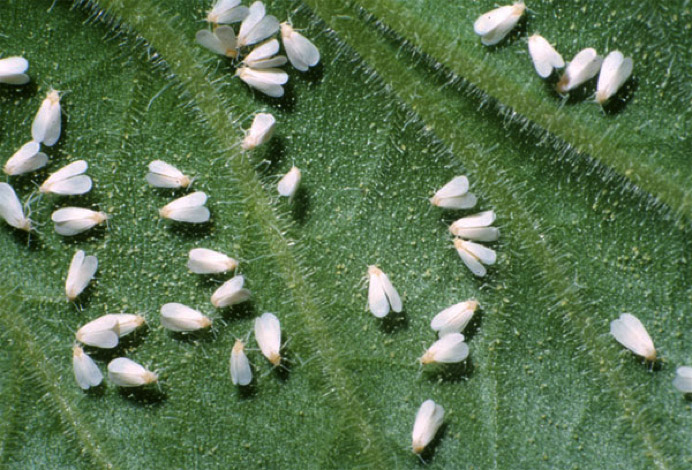
White fly

White flies

White flies infest the shady lush parts of your vegetable garden, clouds of tiny, irritating white insects emerge when disturbed. They feed on the surface of leafy plants such as lettuce, silverbeet and parsley. They damage the leaves and cause them to appear mottled and unhealthy.

White flies can be controlled to a degree with pyrethrum and soap sprays. Their numbers fluctuate seasonally and during periods of high humidity you just have to wait them out.

Mildew

Sooty mould, powdery mildew and downy mildew are all fungal infections that occur on the leaves of some plants. Encouraged by high humidity, they create a dusty film and patches of grey and white fuzz on the leaves – the spores are spread by wind.

Control by removing infected foliage and applying fungicides such as sulphur dust,
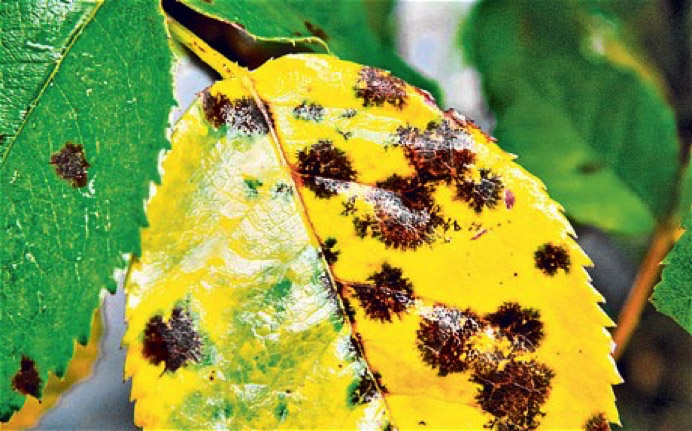
Black spot

Black Spot

Black spot is a fungal disease commonly affecting roses and fruit trees, black spot attacks the leaves causing them to whither and drop prematurely. As with most fungal diseases, it is encouraged by humidty.

Leaves affected by black spot should be removed and disposed of in the garbage – do not compost. Plants can be sprayed in late winter to prevent any outbreak with a copper based fungicide.


Successfully sowing seeds…

Posted by | Garden Advice, Garden Design, Raising seeds, Seedlings, Vegetable gardens | No Comments

pumpkin-seedlingSuccessfully sowing seeds…

Springtime, is the right time for sowing seeds for your summer vegetable and flower gardens. Purchasing seedlings may save you some time, however seedlings can be problematic and often do not transition well from punnet to garden bed.

The varieties of seeds you have to choose from is enormous so you can have fun experimenting with new and unusual vegies and flowers. It’s a great fun, rewarding family activity.

Here is a list of things you need to get started and a list of tips for a successful seed growing adventure…

Seeds! Check the packet for the sowing season if you are unsure whether you have the right ones.

Seed raising mix – seed raising mix is fine, light and sandy, perfect for developing strong roots.

Vermiculite – Vermiculite is an inorganic mineral material that used in soil mixes for its lightweight, absorbant properties. When raising seeds, vermiculite is mixed over the surface of the soil and seeds in the punnets to protect and retain water.

Punnets or seed cells – if you are recycling old punnets wash them thoroughly with soapy hot water to kill any lingering bacteria. Seed cells are great because there is minimal root disturbance when replanting. Plantable pots are another good option as you can pop them straight in the ground when the time comes.

Labels! Ice-cream sticks and a pencil will do the trick, so you can keep track of what’s what.

PR2000003745_card_lg

Misting hose nozzle or spray bottle for watering – Seedlings require regular, gentle watering and normal watering nozzles and rosettes will knock the soil out of the punnets.

A warm sheltered place to grow – most spring seeds need to be kept warm and moist in order to germinate. If you are serious about your seed raising, perspex seed raising boxes can be purchased however you can improvise; styrofoam boxes with a sheet of glass on top works – any solution that maintains light (not direct sunlight), warmth and humidity. Otherwise, a warm, sheltered spot in the garden will work as long as the punnets are not in direct sunlight, however seeds may take a little longer to emerge.

When you are ready for sowing, follow these basic steps to give your little seeds the best shot…

seed-packets-1209-m

Read the seed packets – this is obvious but very, very helpful. This will also be important information as you formulate your garden design plans for situating your seedlings. Your seed packs will tell you what the best conditions are for each particular plant.

Prepare your punnets – mix soil one part vermiculite to four parts seed raising mix.   Fill your punnets and seed cells to the top and tamp down by tapping them on a hard surface. Don’t push the soil into the punnets/cells, as it must remain loose so that the seedling roots can develop.   Keep some vermiculite aside to spread over the top of the seeds once you have sown them.

Sow your seeds – there is two ways to approach this step; you can sow the seeds singly so that you can plant them out once they are big enough or you can sow them in multiples and pick out them strongest once they have grown. Sowing them in multiples requires the extra step of thinning and sometimes ‘potting on’ as seeds that are sown to thick can suffer from dampening which is basically rot due to lack of air circulation.  It will also depend on the type of plant – leafy greens can be sown thickly as you will consume them in volume and in their entirety, but things like cucumbers, and zucchinis are better in singles because apart from the fact that they are much larger seeds, you will only need a half dozen plants for an average back yard vegetable garden.

How deep you sow the seeds depends on the size of the seeds. Tiny seeds can be cast on the top of the soil but larger seeds need to be covered. The general rule of thumb is the depth you sow them should be 2.5 times the diameter of the seed.

Once you have cast your seeds, cover with a fine layer of vermiculite.

Place your punnets in a warm, sheltered position in the garden and keep moist with regular watering. Punnets should not be allowed to dry out for any length of time.

Once the seedlings emerge, continue watering and feed weekly with a half strength liquid fertilizer

hypocotyl Tecomanthe speciosa

When the seedlings develop their second set of leaves, thin and pot on if necessary. When transplanting seedlings, hold them by their leaves rather than their roots as handling the roots can burn them. Use a ‘dibble’ stick to make a hole in the soil of the new pot deeper than the longest root, ensuring that the roots are never bunched up (this can cause deformities in the developing plant).

Continue as before until the seedlings develop their third set of leaves.

Begin hardening them off. Hardening off refers to the process of moving the seedlings from their ‘nursery’ of sheltered indirect light, to full sun. This must be achieved over at least a four-day period.

When you have hardened them off, you are ready to plant them out into the garden beds you have pre-prepared.   Regular watering must continue until seedlings have settled in. Mulching and fertilising are also necessary. Snail pellets are a must, as snails love juicy baby seedlings and can go through an entire crop in one night.

Goodluck!

bigstock-Farmer-planting-young-seedling-74599984-770x472

Already know what you need? Click here to contact us. CONTACT US FOR A QUOTE