Garden Advice Archives - Hedge and Stone

Summer pruning tips

Posted by | Garden Advice, Garden Maintenance, Hedges, Ornamental Trees, pruning, summer gardening, summer pruning, Uncategorized | No Comments

hydrangeaThere are a couple of great reasons to prune our flowering ornamentals and fruit trees in summer…

Summer pruning and removing spent flower heads encourages repeat blooming through the end of summer and on into autumn. With roses, for example, removing not only the spent flower but cutting back 30cm of stem, will encourage an additional flush of long stemmed blooms on the end of the cut branches within six to eight weeks.

Generally speaking, summer pruning retards growth where as pruning in winter prior to the growing season, encourages vigorous regrowth. Pruning in summer, especially for deciduous plants, give you a good opportunity to do some formative pruning while the plants are in foliage and you can really see how the framework looks and how each plant relates to the space around them. Keep in mind that removing too much foliage exposes the plant to more sunlight and just like us, plants get sunburned; citrus and crepe myrtles are particularly susceptible.

Hedges are also great candidates for a summer prune once the mad spring growth has slowed down. A summer tidy up should see you through to their next burst of growth in autumn.

Here is a list of plants that enjoy a prune after they flower in late spring early summer:

Azaleas & rhododendrons

Spirea

Flowering crabapples

Hawthron

Hydrangeas

Magnolias

Philedelphius

Laurel

Serviceberry

Acid Lovers…

Posted by | Acid loving plants, Camellias, Courtyard Garden, Garden Advice, Garden Design, Garden Maintenance, Mulching, Ornamental Trees, Soil pH | No Comments

Camellia101-2Acid loving plants…

Both feared and revered by gardeners, the acid loving plants include popular garden ornamentals such as azaleas, gardenias, daphne, camellia, pieris and rhododendrons. Producing some of the most beautiful and wonderfully fragrant blossoms, these plants can be problematic for gardeners, as generally, they prefer a pH of around 5.5; this lower pH allows them to absorb the nutrients they require.   Along with their particular pH requirements, these plants are sensitive to their microclimate and soil/water conditions.

Valuable maintenance tips for our acid loving plants


Check and balance pH levels

Acid loving plants can survive in soils with a pH range from 5 to 6.2 however prefer the pH to be between 5 and 5.5. You can use a home pH test kit to test your soil – pick one up at your local nursery.  Soils that tend to be too alkaline or have a pH that is too high can be remedied by using the right selection of mulch and compost materials. A good solution is to use leaf mold; it tends to be acidic and breaks down quickly, making it excellent mulch that will also build the organic matter in the soil and lower the pH. If the pH needs adjusting there are many products available that introduce combinations of iron & sulphur into the soil to increase acidity and lower pH.

Mulch

As acid loving plants tend to require a soil rich in organic matter, mulches that break down have the added benefit of building the soil as they compost. Choose mulches like lucerne & pea straw. Using a long-term mulch like wood chips will require a separate program for maintaining the organic matter in the soil below and as the root systems of these plants are sensitive, is not ideal. Rhododendrons and camellias have shallow, fibrous root balls, which need to be kept cool and moist.

Irrigation

Regular watering is essential so choose a suitable watering system so either a well placed drip system or over-head system is preferred. Irregular, deep watering is not recommended as it causes the plants to drop their buds. Aerial sprays are an excellent choice for maintaining azaleas as spraying the underside of azaleas helps control spider mite infestations – a common pest affecting azaleas.

Pruning

Only ever prune these plants to shape or when hedging azaleas – otherwise it is not required. Disbud Camellia japonicas to improve the quality and size of the blossoms; remove excess flower buds along stems for optimal spacing and leave two buds at the terminus of the branch only. Rhododendrons can be deadheaded; take care not to damage the nodes beneath the blossoms on the stem otherwise there will be no new growth or flowers next season.

Soil Maintenance

This includes checking and improving drainage and amelioration. Improve clay soils by adding organic matter and using gypsum or clay breakers where necessary. Sandy soils can be built up with the addition of organic matter.

Fertilising

In soils with significant deficiencies, feed acid loving plants with a fertiliser designed specifically for the needs of acid loving plants. They contain added iron and sulphur to help maintain a low pH and often also include a soil wetter to aid in maintaining soil moisture:

Disbud

To increase flower size and vigor of the japonica camellias, remove excess flower buds along stems for optimal spacing and leave two buds at the terminus of the branch only.

rhododendron_lem's_cameo

Irrigation…

Posted by | Garden Advice, Garden Design, Garden Maintenance, irrigation, Landscape Advice, Mulching, Vegetable gardens, Watering | No Comments

Impact_Sprinkler_Mechanism_2Gone are the days of running the sprinkler during hot, lazy summer afternoons. Residential irrigation systems are becoming an essential management tool to maintain our gardens while supporting water saving initiatives.

One of the key steps to designing your irrigation is to understand the water requirements of your plants and the natural attributes and deficiencies of your site. Conditioning soil and mulching will maximize water retention and should be considered an essential element of your ‘irrigation system’.

You can divide your garden into primary, secondary and minimal hydro zones:

  • Primary hydro zones include turf, entranceways and formal beds as well as vegetable plots – these types of gardens require regular supplementary watering.
  • Secondary hydro zones include established ornamental beds with shrubs and small trees that require routine but minimal supplementary watering.
  • Minimal hydro zones are those that require little or no supplementary watering.

As well as helping you choose the right type of irrigation, these zones can also be used to manage your overall irrigation system, including a schedule for soil improvement and rebuilding mulch.

Primary and secondary hydro zones can be fitted with a combination of spray and drip irrigation systems. All spray sprinklers lose water due to weather condition and evaporation but are essential for irrigating turf or large zones. Drip systems are much more efficient and are generally easier to maintain. The most common sprinkler fittings are as follows:

Pops up sprinklers – excellent for turf as they are submerged when switched off so do not create a hazard or incur damage. Not great for garden beds as vegetation can interfere with spray.

Fixed spray sprinklers – installed on risers in garden beds, these can be set to a fixed radius or pre-set arc so maximize efficiency. These work particularly well in garden beds with established plants and fixed requirements.

Rotator nozzles – can be installed and rotate in a sweeping arc. These work well to cover large areas but are only effective in calm weather conditions.

Drip irrigation – the most water efficient irrigation system for garden beds. Minimal water loss through evaporation, no interference from weather conditions.

All spray sprinklers lose water due to weather condition and evaporation.

The other essential component of your irrigation system is the system sensor and computer – these are small devices either fitted to the main tap head or fixed to a wall or fence. The system sensor measures rain, soil moisture and evapotranspiration and transmits this data to the system computer. The system computer regulates the timing and flow rates to your garden. You can have single or multiple hydro zones with varied timing and flow rates for the perfect soil moisture balance.

Watering…

Posted by | Garden Advice, Garden Design, Garden Maintenance, Uncategorized, Vegetable gardens, Watering | No Comments

4581-gardenwaterleadUnderstanding your soil type is the first step to effective watering.  Soil types can be broken into three basic categories, loam, clay and sand.

Loam soil – Loam is the ideal soil type, it holds water and drains well and can be watered deeply and infrequently.

Clay soil – Clay soil holds moisture for long periods however if allowed to dry out can become hard and hydrophobic and water can just run off. It can be improved by tilling with organic matter and by adding gypsum. Water deeply and slowly so that water can soak through.

Sandy soil – Sandy soils should be watered frequently in smaller volumes as water tends to drain away and soil will dry out again quickly.

This diagram shows how water is distributed in different soil types:

images

Building a loamy soil by adding compost and organic matter, breaking up clay with gypsum and adding coco-peat to sandy soils will make a huge difference to your garden’s water needs.

Great elements for building soil are cocopeat, compost, green manure, composted animal manure, straw and worm castings.

As discussed in an earlier article Mulch, mulch, mulch  – mulch can potentially reduce your water requirements by up to 60%. Cover beds with 75mm of composted pine mulch or 40mm of pea or cane mulch for vegetable beds.

At the end of the day, the plants in your garden will dictate how much you need to water. Good garden design and understanding the cultural needs of your plants will allow you to make decisions about when and how much water needs to be added.

One you know your soil type and your plants requirements, you water accordingly. If you are hose watering, you can test the flow rate by measuring the time it takes to fill a 10L bucket, which will give you a good idea, of how much water you are applying. Add water directly to the root zone.

Rather than frequent, surface watering, deep watering through the root zone encourages deep root development. In the long run, encouraging deep root development circumvents the need for regular supplementary watering – do this for juvenile trees, shrubs and perennials to establish strong root development and cut down on water consumption in the future. Plants with naturally shallow or fibrous root balls such as Camellia’s will always need frequent, regular watering as well as a good layer of leaf mold and mulch to keep the root ball cool and moist. Pot plants, annuals and vegetables will need frequent, regular watering.

Installing irrigation systems cuts out the labour and along with developing your soil can provide a customized supplementary water program that will allow your garden to flourish.


Successfully sowing seeds…

Posted by | Garden Advice, Garden Design, Raising seeds, Seedlings, Vegetable gardens | No Comments

pumpkin-seedlingSuccessfully sowing seeds…

Springtime, is the right time for sowing seeds for your summer vegetable and flower gardens. Purchasing seedlings may save you some time, however seedlings can be problematic and often do not transition well from punnet to garden bed.

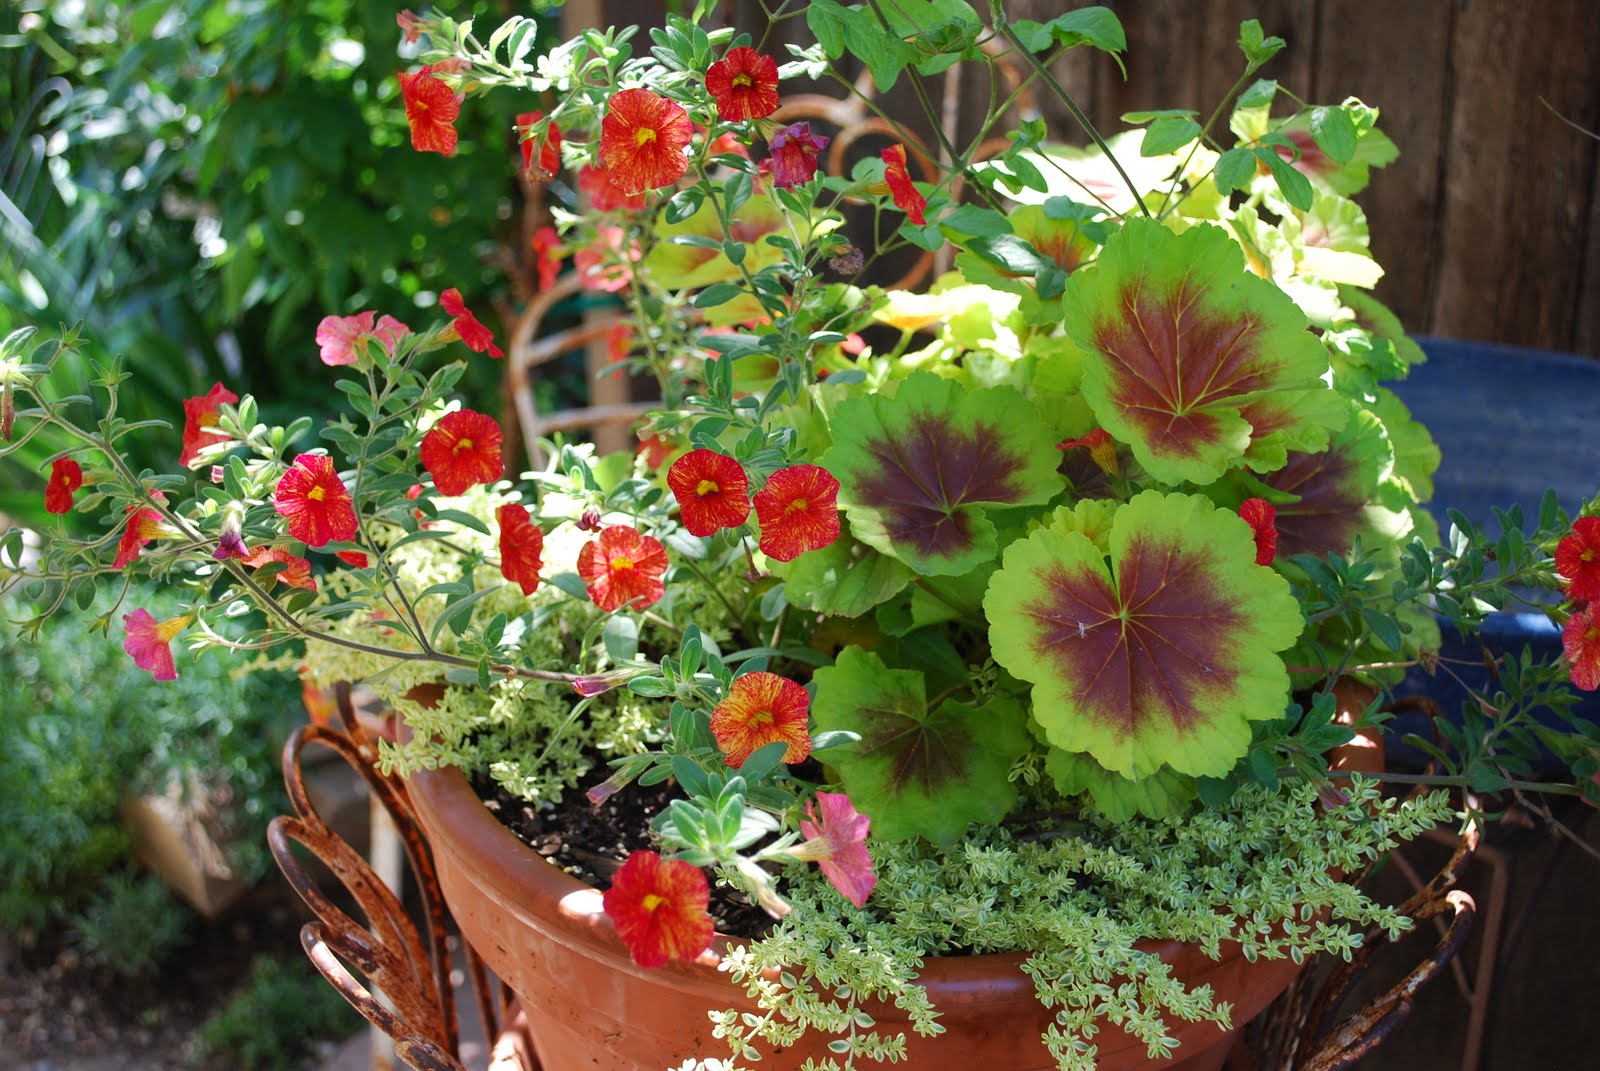
The varieties of seeds you have to choose from is enormous so you can have fun experimenting with new and unusual vegies and flowers. It’s a great fun, rewarding family activity.

Here is a list of things you need to get started and a list of tips for a successful seed growing adventure…

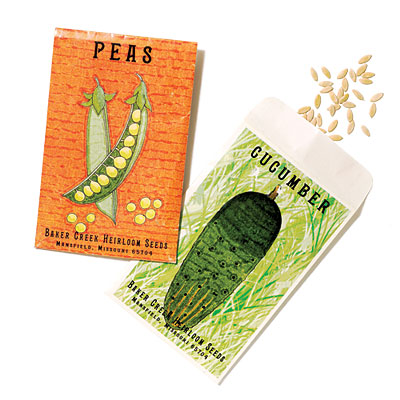
Seeds! Check the packet for the sowing season if you are unsure whether you have the right ones.

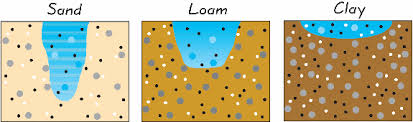
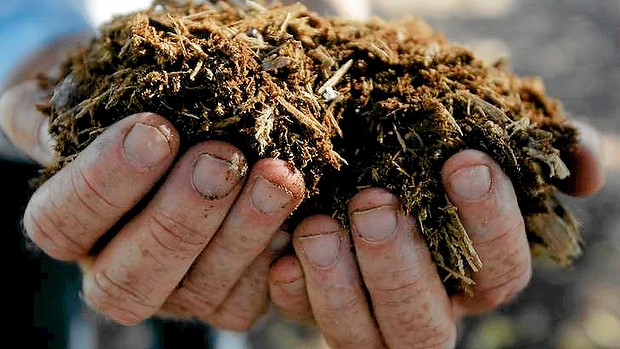
Seed raising mix – seed raising mix is fine, light and sandy, perfect for developing strong roots.

Vermiculite – Vermiculite is an inorganic mineral material that used in soil mixes for its lightweight, absorbant properties. When raising seeds, vermiculite is mixed over the surface of the soil and seeds in the punnets to protect and retain water.

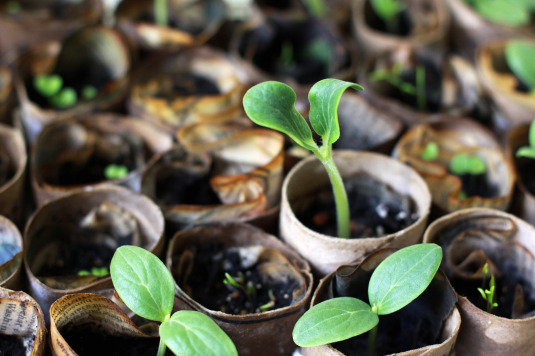
Punnets or seed cells – if you are recycling old punnets wash them thoroughly with soapy hot water to kill any lingering bacteria. Seed cells are great because there is minimal root disturbance when replanting. Plantable pots are another good option as you can pop them straight in the ground when the time comes.

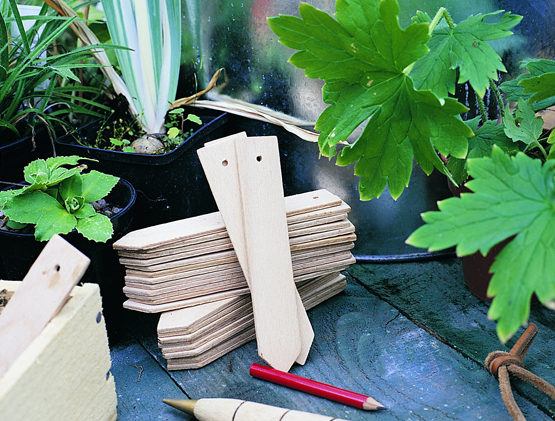
Labels! Ice-cream sticks and a pencil will do the trick, so you can keep track of what’s what.

PR2000003745_card_lg

Misting hose nozzle or spray bottle for watering – Seedlings require regular, gentle watering and normal watering nozzles and rosettes will knock the soil out of the punnets.

A warm sheltered place to grow – most spring seeds need to be kept warm and moist in order to germinate. If you are serious about your seed raising, perspex seed raising boxes can be purchased however you can improvise; styrofoam boxes with a sheet of glass on top works – any solution that maintains light (not direct sunlight), warmth and humidity. Otherwise, a warm, sheltered spot in the garden will work as long as the punnets are not in direct sunlight, however seeds may take a little longer to emerge.

When you are ready for sowing, follow these basic steps to give your little seeds the best shot…

seed-packets-1209-m

Read the seed packets – this is obvious but very, very helpful. This will also be important information as you formulate your garden design plans for situating your seedlings. Your seed packs will tell you what the best conditions are for each particular plant.

Prepare your punnets – mix soil one part vermiculite to four parts seed raising mix.   Fill your punnets and seed cells to the top and tamp down by tapping them on a hard surface. Don’t push the soil into the punnets/cells, as it must remain loose so that the seedling roots can develop.   Keep some vermiculite aside to spread over the top of the seeds once you have sown them.

Sow your seeds – there is two ways to approach this step; you can sow the seeds singly so that you can plant them out once they are big enough or you can sow them in multiples and pick out them strongest once they have grown. Sowing them in multiples requires the extra step of thinning and sometimes ‘potting on’ as seeds that are sown to thick can suffer from dampening which is basically rot due to lack of air circulation.  It will also depend on the type of plant – leafy greens can be sown thickly as you will consume them in volume and in their entirety, but things like cucumbers, and zucchinis are better in singles because apart from the fact that they are much larger seeds, you will only need a half dozen plants for an average back yard vegetable garden.

How deep you sow the seeds depends on the size of the seeds. Tiny seeds can be cast on the top of the soil but larger seeds need to be covered. The general rule of thumb is the depth you sow them should be 2.5 times the diameter of the seed.

Once you have cast your seeds, cover with a fine layer of vermiculite.

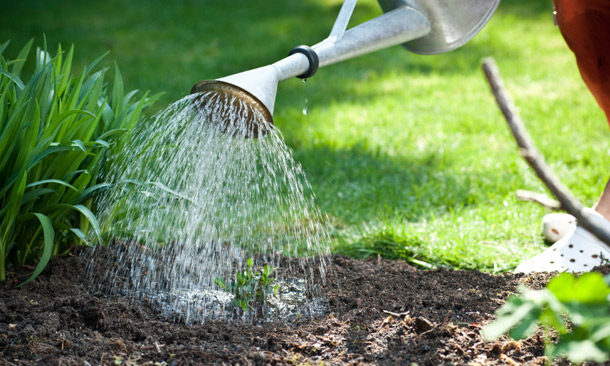
Place your punnets in a warm, sheltered position in the garden and keep moist with regular watering. Punnets should not be allowed to dry out for any length of time.

Once the seedlings emerge, continue watering and feed weekly with a half strength liquid fertilizer

hypocotyl Tecomanthe speciosa

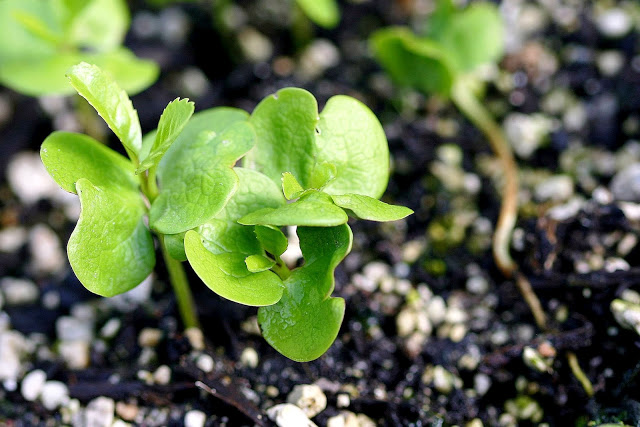
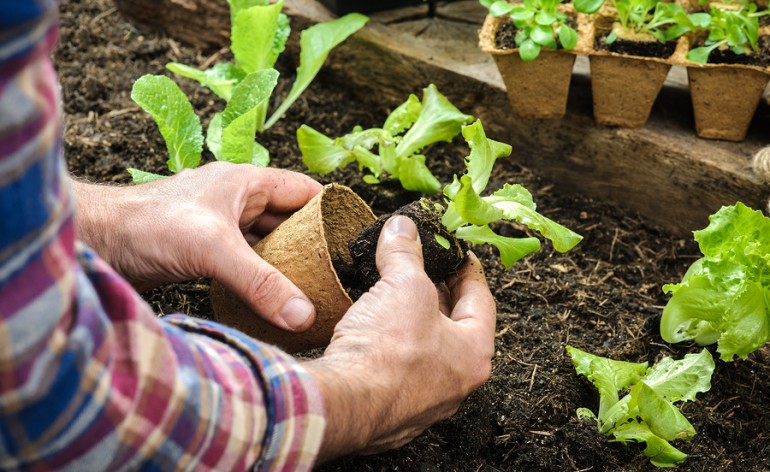
When the seedlings develop their second set of leaves, thin and pot on if necessary. When transplanting seedlings, hold them by their leaves rather than their roots as handling the roots can burn them. Use a ‘dibble’ stick to make a hole in the soil of the new pot deeper than the longest root, ensuring that the roots are never bunched up (this can cause deformities in the developing plant).

Continue as before until the seedlings develop their third set of leaves.

Begin hardening them off. Hardening off refers to the process of moving the seedlings from their ‘nursery’ of sheltered indirect light, to full sun. This must be achieved over at least a four-day period.

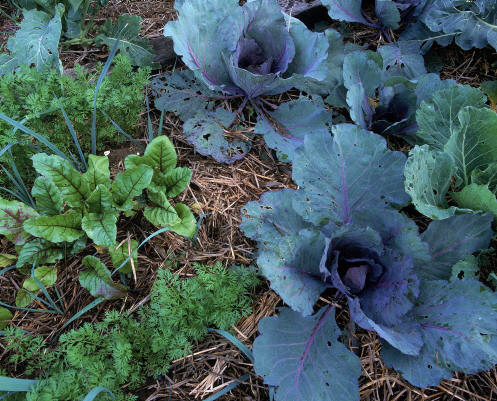
When you have hardened them off, you are ready to plant them out into the garden beds you have pre-prepared.   Regular watering must continue until seedlings have settled in. Mulching and fertilising are also necessary. Snail pellets are a must, as snails love juicy baby seedlings and can go through an entire crop in one night.

Goodluck!

bigstock-Farmer-planting-young-seedling-74599984-770x472

Magnificent Magnolias

Posted by | Courtyard Garden, Garden Advice, Garden Design, Landscape Advice, Magnolia, Mulching, Ornamental Trees, Uncategorized, Winter | No Comments

magnolia-soulangeana_magnolia-genie-flowerHeralding the coming of spring, Magnolias, especially the deciduous varieties hold a special place in the hearts of many a gardener with their stunning displays of large, fragrant blooms on elegant naked branches. Originating in Asia there are over 100 species and unnumbered cultivars. They are well adapted to Australian conditions and provided you give them a good position and adequate food and water they will reward you for many years.

Magnolias can be a little sulky for the first few years so feed them well when you first plant them with a good compost, build a well around the base of the trunk to direct water into the root zone and mulch well to keep the roots moist and cool. Choose a north or east facing position with shelter from hot winds and frost.

Here are 10 of our favorites with a brief description and their height and width noted so you can make a good choice for your site:

Deciduous varieties

magnolia_x_soulangeana_flowers_16-03-11_1-2Magnolia x soulangeana
cv. 3m X 3m; one of the old varieties and the basis of many cultivars Magnolia x soulangeana is perhaps the most common Magnolia seen in Melbourne gardens.

Magnolia_stellata_RJBMagnolia stellata 1.5m X 1.5m; a slow-growing medium-sized deciduous shrub of broadly rounded habit, flowering in early spring. This Magnolia is particularly stunning because of it fine white petals. It also comes in a pink variety Magnolia stellate rosea.

Magnolia-Caerhays-Belle2-590by387Magnolia ‘Caerhays Belle’ 7m X 5m; a very narrow, fastigiate shape, excellent for a small garden because it needs almost no pruning and has a beautiful fragrance.

Magnolia Philip TMagnolia ‘Phillip Tregunna’ 5m X 3m; an upright tree, with a vivid purple flower and a beautiful fragrance.

Magnolia rubyMagnolia ‘Ruby’ 3m X 2m; a beauty because of the beautiful, exquisite shape of the bud and also a white edge around each of the petals. Does well in a smaller garden and can be pruned to shape.

Magnolia vulcanMagnolia ‘Vulcan‘ 3m X 2m; a hybrid raised in New Zealand. The flowers are large, wine red and lightly perfumed.

Magnolia elizabeth
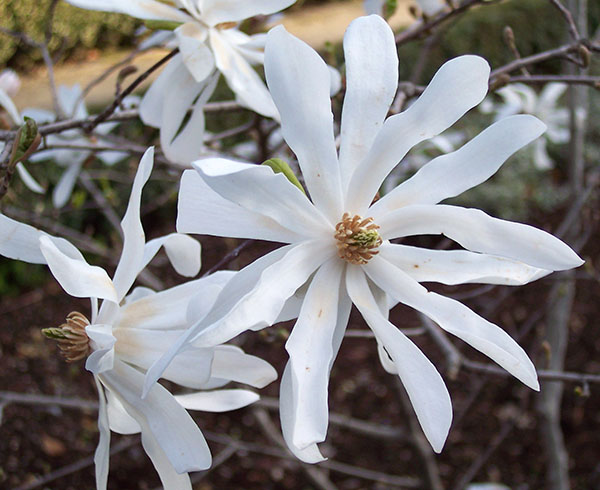
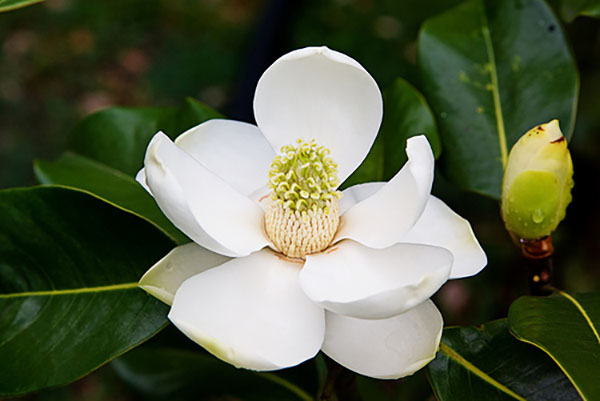
Magnolia ‘Elizabeth’ 4m X 2.5m; with perfumed primrose yellow fading to cream coloured flowers. It is later flowering than other magnolia varieties blossoming in late spring.

magnolia-royal-purpleMagnolia ‘Royal Purple’ 3.5m X 1.2m; a beautiful new magnolia from New Zealand; a narrow yet stunning column with 20cm cup and saucer shaped blooms, dark red purple with a gorgeous perfume. A great choice for a small space.

Evergreen varieties

magnolia Little gemMagnolia ‘Little Gem’ 5m X 2.5m; a very popular plant used as an ornamental lawn tree or as for screening and even hedging. It is an outstanding variety of Magnolia grandiflora with a compact habit, deep green discolourous leaves and large white blooms.

 Magnolia st maryMagnolia ‘St Mary’ 6m X 3m: A wider growing variety with large glossy apple green leaves. It is a hardy and versatile plant that will tolerate a range of conditions and is relatively pest and disease free. During the warmer months it produces beautiful, creamy-white, fragrant flowers and will flower from an early age.

Mulch, mulch, mulch

Posted by | Garden Advice, Garden Maintenance, Landscape Advice, Mulching, Uncategorized | No Comments

ch_wide_mulch_20121126231108575608-620x0
In our climate, mulching is one of the most sensible, cost effective treatments you can apply to your garden for all round positive results. Using the right mulch and using it the right way, can reduce the need to water by up to 60%, improve soil conditions, help minimize the need for manual weeding or herbicides and nourish your garden.

Your options for mulching are organic and inorganic. The inorganic mulches are pebbles, scoria and gravel – these should be used judiciously as they can be a challenge to maintain in some situations. Organic mulches range from lawn clippings, leaf litter, cubed mulches, baled lucerne or pea straw to the hardier composted bark mulches.

Organic mulches are your best option for overall garden health; as they slowly breakdown they encourage microbial activity and worms, which in turn nourish and oxygenate the soil as well as adding organic matter and improving soil structure. Good mulch will secure moisture in the top layer of the soil and discourage weeds, which compete with plants for nutrients and water.

Lawn clippings and leaf litter are a handy option, however are better put to use in the compost, as they are yet to breakdown. Using them as mulch can have the unwanted side effect of reducing the nitrogen in your soil, as the little microbes that will do the composting require nitrogen to go about their business. This is called nitrogen drawdown and anything that is not fully composted before adding to the garden can have this effect. It can however, be easily counteracted by applying a good fertilizer.

Cubed mulches, which are a chopped pea straw or lucerne, are easy to spread but will soften and break down quickly so are excellent as soil conditioners but not a mulch with any long term prospects.

Baled lucerne and pea straw are another great option, especially in productive garden beds as they supply all the benefits of good mulch but can be easily dug in to the soil at the end of a season to add essential organic matter. They are also inexpensive, easy to come by and easy to handle. Ordinary hay should be avoided, as it will invariably carry unwanted seeds.

If you are going for the bark mulch option, always choose composted bark mulch and select the grade or ‘coarseness’ carefully. Fine grade mulch can actually act as a barrier to water as it compacts and can also form a seedbed for unwanted weeds. The mulch should be medium to large grade and spread up to 7.5cm deep. These larger particle mulches allow water to trickle through to the soil and do not compact over time. Most of the bark mulches available to us are by products of the pine industry, which is an advantage, as these products tend to acidify the soil as they decompose which is great, as most plants prefer a neutral to lower pH soil.

Happy mulching!

mulched garden

Winter…where did my garden go?

Posted by | Garden Advice, Garden Design, Landscape Advice, Winter | No Comments

Cherry Blossom

At first glance, your garden may appear to be barely alive in the long, dark cold days of winter. Most of the deciduous plants will be skeletal versions of their springtime selves, the ground hard and bare where all the spring and summer perennials have rotted away, the summer grasses yellowing off…a general sense of stillness that could be mistaken for lifelessness pervades.

Appearances, as we know, can be very misleading. This period of stillness that occurs in our gardens is an essential time in the lifecycle of our plants. In fact, this dormancy allows us to enjoy many of things we consider most valuable in our gardens; foliage, flowers and fruit!

For many of the plants that originate in colder climates, winter is a time for conserving nutrients, rebuilding tissues and a whole bunch of other unseen yet essential chemical processes.

Deciduous plants typically lose their leaves; as the temperature drops the plants metabolism slows, resulting in a decrease in chlorophyll – the chemical used to turn sunlight into energy – which also gives leaves their green pigment. As the chlorophyll production stalls during the cold, the leaves of many deciduous trees, such as Liquidambar styraciflua – turn from green, to gold, to that lovely deep red we all love.

We all notice the summer grasses such as buffalo, kikuyu and couch yellowing off, with growth slowing to next to nothing. Most of us count this as a bonus of the cold weather…no mowing! These are winter dormant rhizomatous grasses and all return with renewed vigor as soon as the spring arrives.

During winter, while all but appearing dead, many trees hide their buds beneath layers of bud scales and actually need to be chilled for a period of time to cause them to burst forth into flower and foliage – cherry trees are one such tree. Bulbs are another garden favorite that require a sustained drop in temperature to promote growth. No cold, no flowers!

Apples need over a 1000 hours exposure to temperatures below 7°c to ensure the production of a hormone that initiates spring growth…no cold, no apples!

So there is magic going on quietly, beneath the cold surface in our winter gardens.

Potted Gardens

Posted by | Container Plants, Courtyard Garden, Garden Advice, Garden Design, Landscape Advice, Potted Plants | No Comments

fresh-containers-garden-container-garden

Creating a potted garden is just like arranging flowers; you build up layers of texture, colour and form in an arrangement to fill, highlight or lift the space…and when you are ready for a change, you just rearrange. Another reason for choosing to pot plants is that soil conditions and plant selection are not always compatible; if you have alkaline soil but love camellias a container plant may be your best option. Similarly, climate conditions are a factor; some of our favorite plants are too sensitive to be permanently positioned in the garden so container planting is a great solution allowing you to reposition the plant during the searing heat of summer or the frosty winter.

Here are some great tips for choosing and maintaining your container plants…

  1. The first considerations will be the practical; how much space, light, heat and water is available? How much time do you have for maintenance? Do you want to water regularly? When you have identified your needs you will be able to refine your plant selection.
  2. In temperate conditions you will be able to maintain ferns and succulents in the same space, otherwise keep to plants that will thrive in the conditions available. This will minimize maintenance and avoid disappointment.
  3. Choose plants for their foliage as well as their flowers. The foliage will be with you all year round but you will only have the flowers for their seasonal appearance. If you are after colour all year, there are many perfect container plants with colorful foliage such as aglaonema, coleus, caladium, begonia, hosta and bromeliad name a few.
  4. Use contrast in the colour palette; soft grey foliage really pops against burgundy’s and deep greens.
  5. Choose the right container. Drainage is essential so make sure there are adequate drainage holes in the base of the pot. Before you add potting mix, place some stones or chunks of broken brick or paving in the base to add another layer for free drainage. The three main types of pots available are plastic, terracotta and glazed ceramic pots. If the pots are going to be exposed to the summer heat, choose one of the glazed ceramic variety as plastic pots heat up quickly and soil temperatures can top 70°c which will destroy the root system of most plants. Terracotta pots are porous so are great for plants like lavender and geraniums which require excellent drainage but for most other plants will mean you must water daily. Choose a pot size that will allow the root system to develop.
  6. Use a good quality potting mix. Potting mix was developed for use in pots and unlike soil, which can set like concrete, fail to drain or even produce weeds, potting mix is free draining, sterile and compatible with plants. A well-composted mix has the right balance of particle sizes to hold air and water and has nutrients to feed the plants that are grown in it. There are special mixes developed for particular plants like orchids, camellias etc.
  7. Water wisely! Indoor plants are often over-watered, especially in winter; a sign that you are over doing it is yellowing foliage as the water-clogged soil is drowning the roots so that the plant cannot access oxygen. Plant saucers holding water prevent soil drainage so must be kept empty to avoid root rot. Conversely, outdoor pots need consistent and regular watering especially through the heat of our summer to prevent heat damage to the roots. As mentioned, container selection and knowing your plants requirements will help strike the right balance. Use a finger to measure the moisture in the soil.
  8. Ideally, pot plants are repotted every year or two in early spring; a chance to increase pot size and rejuvenate the soil and root system.
  9. Fertilisers formulated for potted plants are available and the liquid varieties are the best option to avoid over doing it. Fertilise when the plants are actively growing and will use the help. Avoid fertilising in the heat.

Goodluck!

Already know what you need? Click here to contact us. CONTACT US FOR A QUOTE